Create a Narrated Micro-Course with Zendeck's PPT-to-Video in 4 Steps
Create a Narrated Micro-Course with Zendeck's PPT-to-Video in 4 Steps
You've built the slides. You've got the expertise. What you don't have is a spare evening to set up a studio, wrestle a microphone, and edit out every awkward pause from a two-hour recording session.
Let's be real: building a narrated micro-course used to demand three separate skills — writing, recording, and video editing. Most educators and trainers have maybe one of those. That's why thousands of solid slide decks die as static PDFs instead of becoming the video courses their audiences actually want to watch.
Zendeck's PPT-to-Video closes that gap. You bring your slides; Zendeck turns them into a narrated, accessible micro-course with a professional AI voice — and if you want, an AI avatar on screen. No filming, no editing, no studio. Here's the four-step workflow.
01 Why You Should Convert Your Slides into Video in the First Place
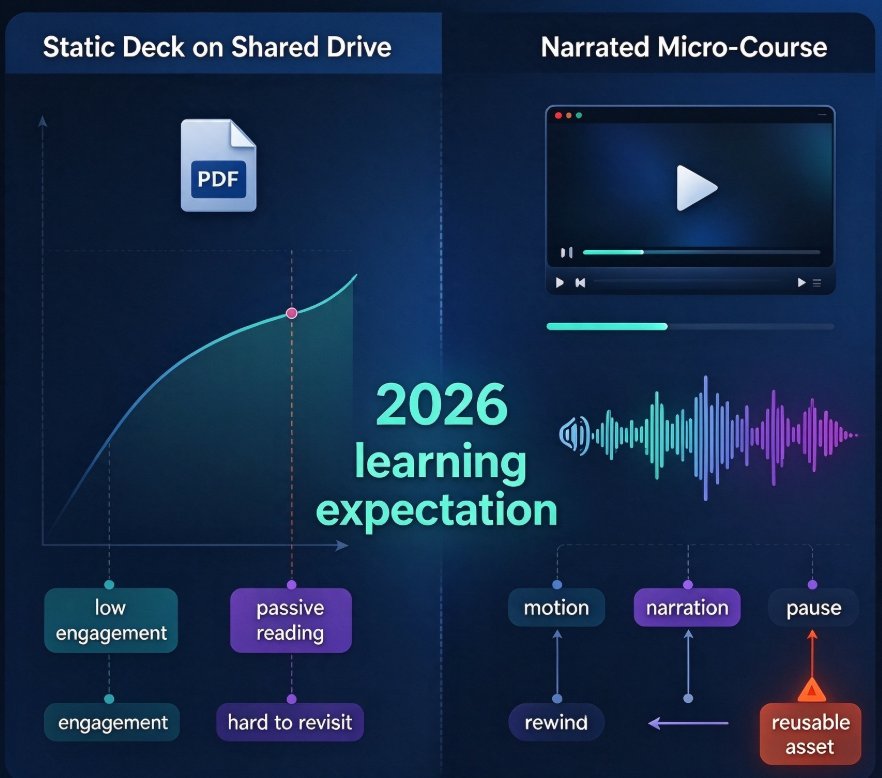
Pain point: Learners in 2026 expect motion and narration, not static documents. A deck that sits on a shared drive doesn't hold attention the way a concise narrated walkthrough does.
Solution: Reuse what you already have. Your slides and speaker notes are the raw material — you don't need to create new content, you just need to present it in a video format.
Outcome: Your learners get a structured, narrated micro-course they can pause, rewind, and revisit. You get a reusable asset for your LMS, YouTube channel, or internal knowledge base.
If you want to dig deeper into how video decks are reshaping corporate training, we've covered the trend in our analysis of AI-generated video decks replacing traditional corporate training.
02 What Zendeck's PPT-to-Video Actually Does
Before the steps, let's clear up the "what." Zendeck's PPT-to-Video is not a screen recorder, and it's not a video editor. Zendeck's PPT-to-Video reads your slide content and speaker notes, generates a script, and produces a narrated video with a consistent visual identity — no recording, no editing, no studio.
Here's how that compares with the traditional production paths:
| Traditional studio filming | Manual PPT + separate audio | Zendeck PPT-to-Video | |
|---|---|---|---|
| Scripting | Write separately, rehearse | Write in speaker notes | Auto-generated from your notes |
| Voice recording | Mic, room setup, clean audio | Record per slide, insert files | AI voice, select tone & language |
| Video editing | Multiple editing passes | Manual timing sync | Automated sync and narration |
| On-screen presenter | Camera + lighting required | Not available | AI avatar narration option |
| Subtitles/captions | Manual transcription | Manual transcription | Auto-generated subtitles |
| Time for a 10-minute course | 10–12 hours | 5–7 hours | 1.5–2 hours |
The gap becomes even clearer when you visualize it:
If you're new to the full tool, our PPT-to-Video category page has more related guides.
03 Step 1: Prepare Your Script and Speaker Notes
The most important step — and the one most people rush. Zendeck's PPT-to-Video generates its narration from your slide content and speaker notes. The quality of your speaker notes determines the quality of your course. That's not a guess; it's the difference between a course that feels natural and one that feels like a slide deck being read aloud by a machine.
Pain point: Most decks have speaker notes that are either empty or written in the shorthand of their author — full of internal references that make no sense to a learner.
Solution: Write conversational speaker notes for each slide. One to three short paragraphs per slide works well. Start each slide's notes with a hook or connection to the previous one, and end with a clear transition. Use plain, spoken English. Avoid acronyms the audience won't know.
Outcome: Zendeck reads your notes and generates a voiceover that sounds like a thoughtful presenter walking through the material — not like a text-to-speech bot reading a spec sheet.
Tip: Write your notes the way you'd talk to a colleague over coffee, not the way you'd draft a report. Short sentences, natural connectors, and a clear "why this matters" in every block.
04 Step 2: Choose Your Voice and Avatar
Pain point: A course narrated by a flat, robotic voice loses credibility within thirty seconds.
Solution: Zendeck gives you control over the narrator's tone, language, and pacing. If you want a presenter on screen, choose the AI avatar option — a digital human that narrates your slides with a professional visual presence. This matters for corporate onboarding, compliance, and certification content, where learners respond better to a person on screen.
Outcome: You get presentation-quality narration without hiring a voice actor or stepping in front of a camera.
Watch out: Match the avatar and tone to the audience. A formal compliance module calls for a neutral, professional narrator; an internal onboarding course can be warmer and more conversational. For more depth on this, check out our guide on AI avatars for educators.
05 Step 3: Generate Narration and Sync with Your Slides
Pain point: In the old workflow, syncing audio to slide transitions was manual and error-prone. Record one slide too long and you had to adjust everything after it.
Solution: Zendeck handles the sync automatically. It reads your notes, generates the narration, and times each slide to its corresponding voiceover. You review the result, adjust pacing or wording, and regenerate. The slide-by-slide approach means you only redo the slides that change — if slide 12 needs new content, you regenerate slide 12's narration, not the whole video.
Outcome: The course flows naturally, with narration that supports the visuals and transitions that feel intentional.
A practical rule we've seen work well in teams: prepare a consistent set of speaker notes for every slide before you start generating, then let Zendeck handle the rest. For more on the narration workflow specifically, our article on adding narration to slides with Zendeck's PPT-to-Video covers the options in detail.
06 Step 4: Export, Add Auto Subtitles, and Publish
Pain point: Once the video is generated, you still need captions, the right file format, and a clean path into your LMS or content channel.
Solution: Zendeck auto-generates subtitles from the narration — a feature that improves accessibility and engagement, especially because many viewers on platforms like YouTube watch with the sound muted. Then you export the final video and publish it to your LMS, YouTube, or internal portal.
Outcome: A complete, accessible micro-course ready for distribution — no video editor, no manual captioning, no post-production cleanup.
If accessibility is a priority for your team, our guide on accessible micro-courses with auto subtitles from PPT shows how Zendeck handles captions and inclusive layouts end to end.
07 The Bottom Line: From Deck to Delivered Course
In under two hours, you can publish a professional narrated course that previously would have required 10+ hours of filming, recording, and editing. That's the real story of Zendeck's PPT-to-Video: it doesn't just speed up the production. It removes the barrier between having content and sharing it as video.
Pain point: Teams with deep subject expertise keep delaying video courses because nobody wants to learn a video editor.
Solution: Zendeck's PPT-to-Video makes course production a content operation, not a production operation. The same workflow works for one course or fifty.
Outcome: More courses, published faster, with consistent quality and branding. That's a game-changer for L&D teams, educators, HR, and anyone whose knowledge lives in slide decks.
FAQ
Q: How does Zendeck's PPT-to-Video turn my slides into a narrated course? A: Zendeck reads your slide content and speaker notes, generates a natural AI voiceover, syncs it to each slide, and exports a finished video. No recording, editing, or video production experience required.
Q: Can I use an AI avatar in my narrated micro-course? A: Yes. Zendeck offers AI avatar narration, giving your course a professional on-screen presenter without the need for a camera, studio, or live recording.
Q: Does Zendeck add subtitles to my video course? A: Yes. Zendeck auto-generates subtitles from the AI narration, which improves accessibility for viewers and boosts engagement on platforms where videos are watched with the sound off.
Q: How long does it take to create a micro-course with Zendeck's PPT-to-Video? A: For a typical 10–15 slide deck with speaker notes, you can have a finished narrated video in under two hours. Traditional studio-based production can take 10–12 hours for the same result.
Q: What if I need to update one slide after generating my video? A: Zendeck works slide-by-slide. If a single slide changes, you regenerate only that slide's narration and the video updates — no full rebuild required.