How to Add Narration to Your Slides with Zendeck's PPT-to-Video
Let's be real: a silent slide deck is the weakest link in training. You've spent hours building a beautiful presentation, but the moment you hit "share," it just sits there. No voice, no context, no momentum. Learners skim, skip, and move on. Narration changes everything.
A narrated video deck is a micro-course. A silent deck is just a PDF with transitions.
That's why Zendeck's PPT-to-Video feature exists. It turns static slides into narrated video lessons in a few clicks — no design skills, no editing software, no studio. This guide walks you through the full workflow: prepping your slides, recording narration, exporting, and fixing the common pitfalls that trip up most people.
01 | Why Narration Turns Decks into Lessons
Here's the pain point: asynchronous training fails when content is silent. When you're not in the room, learners can't infer tone, emphasis, or the "why" behind each slide. They can't tell which point matters most. A silent deck leaves too much room for misinterpretation.
The solution is straightforward: add a voice track. Narration gives your slides context, personality, and pacing. It tells learners where to focus, how to think about each concept, and what to do next.
The outcome? Learners stay engaged, retention improves, and your deck becomes a self-contained lesson that works without you in the room.
Studies consistently show that video-based training improves knowledge retention compared to text-only materials — and narrated slides are the fastest way to get there without a production team.
Here's the thing about attention: it's scarce. When you're presenting live, you have the room's focus. When you share a deck for people to review on their own, you're competing with email, Slack, and a dozen other tabs. Narration is your competitive edge — it holds attention the way a live presenter does.
Think about the scenarios where this matters:
- Micro-courses: A 5-minute narrated deck is a perfect micro-lesson.
- Onboarding: New hires can watch narrated decks at their own pace.
- Client pitches: A narrated walkthrough explains your story even when you're not on the call.
- Internal training: Compliance, product updates, process changes — all work better with a voice.
If you're building training content, you're probably already thinking about interactive training modules. Narration is the layer that makes those modules feel alive.
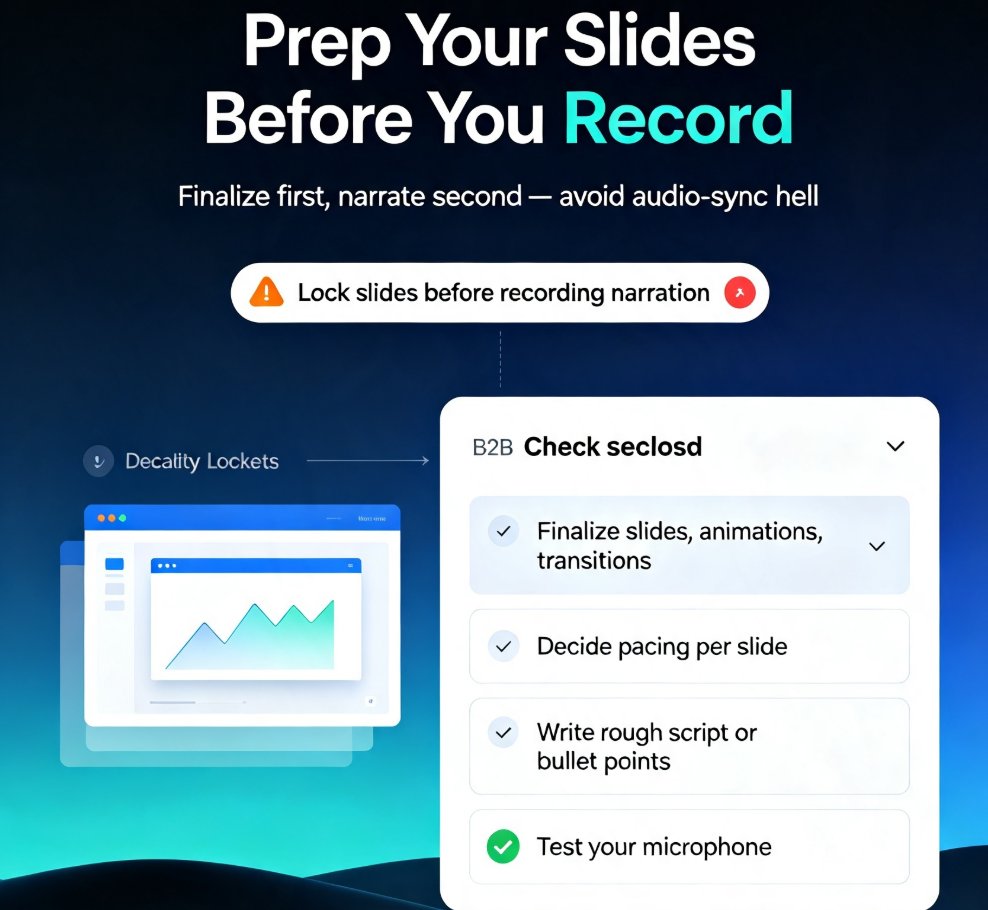
02 | Prep Your Slides Before You Record
Here's a mistake almost everyone makes: they record narration first, then edit the slides. That's a one-way ticket to audio-sync hell.
Finalize your slides before you record a single word of narration.
Why? Because slide timings and narration are tightly coupled. If you add or delete a slide after recording, every subsequent timing shifts. Your audio drifts out of sync, and you're stuck re-recording everything.
Here's a quick prep checklist:
- Finalize all slides, animations, and transitions. If a slide is still in flux, don't record yet.
- Decide on pacing. How long should each slide stay on screen? A good rule of thumb: 20–30 seconds per slide for narrated content, but adjust based on complexity.
- Write a rough script or bullet points. You don't need a word-for-word script, but knowing what you'll say per slide keeps you on track.
- Test your microphone. A quick 10-second test recording saves you from discovering audio issues halfway through.
This prep work pays off. When your slides are locked, recording becomes a clean, one-pass process.
03 | Record Narration in Zendeck's PPT-to-Video
Now the fun part. Zendeck's PPT-to-Video makes narration recording feel less like a production task and more like talking through your deck.
Here's the step-by-step workflow:
Step 1: Open your deck in Zendeck. Make sure your slides are finalized and organized. This is the deck you'll be narrating.
Step 2: Launch the PPT-to-Video feature. You'll find it in the deck toolbar. This is where the magic happens — no separate recording software, no export-import dance.
Step 3: Record narration slide by slide. You can record each slide individually. This is a huge advantage over recording the whole deck in one take. If you flub a line on slide 4, you only re-record slide 4, not the entire presentation.
Step 4: Review and redo as needed. Play back each slide's narration. If it doesn't sound right, re-record. No penalty, no fuss. This is the "redo as many times as you want" workflow that makes narration feel low-stakes.
Step 5: Sync timings. The tool automatically syncs your narration with slide timings. You don't have to manually match audio to slides — it handles that for you.
Step 6: Preview the full video. Watch the whole thing from start to finish. Check pacing, transitions, and audio quality.
One more tip: record in a quiet space. You don't need a studio, but a room with soft surfaces (carpet, curtains) reduces echo. Close the door, mute notifications, and give yourself 10 minutes of uninterrupted time. The cleaner the recording, the less post-production you'll need.
This workflow is dramatically simpler than PowerPoint's built-in recorder, which requires you to navigate menus, manually set timings, and hope the export picks up your narration. The whole process is streamlined.
04 | Narration Delivery: Sound Like a Human
Here's the thing nobody tells you: the best narration doesn't sound like a professional voiceover. It sounds like you, talking naturally.
The best narration is conversational, not theatrical. Speak like you're explaining something to a friend, not presenting to a board.
A few delivery tips that actually work:
- Pause before key points. A half-second pause before a big idea signals "pay attention."
- Vary your pace. Speed up on transitions, slow down on complex concepts.
- Don't read word-for-word. Use your script as a map, not a transcript. Reading aloud sounds robotic.
- Smile while you talk. It sounds cheesy, but it genuinely changes your vocal tone for the better.
- Keep sentences short. Short sentences are easier to deliver and easier to listen to.
Here's a trick I use: record the first slide, listen back, and adjust. Your first take is almost always too fast or too flat. Hearing yourself once recalibrates your delivery for the rest of the deck. It's the cheapest quality improvement you'll make.
If you're worried about what to say, Zendeck can auto-generate speaker notes for your AI decks. That gives you a solid starting point for your narration script.
05 | Export Like a Pro
Once your narration is recorded and synced, it's time to export. Here's where most people hit their first snag — but with the right settings, it's smooth sailing.
Export as MP4. MP4 handles animations and audio more reliably than older formats like WMV. If you've ever had a video export that plays fine on your machine but breaks on a colleague's, MP4 is usually the fix.
Choose your resolution. Higher resolution means larger files but crisper playback. For training videos, 1080p is a solid default. For quick internal shares, 720p is fine.
Confirm timings and narration are included. Before you hit export, double-check that your recorded timings and narration are selected. This is the setting that trips people up — you record narration, then export, and the video comes out silent because the narration track wasn't included.
The export setting that causes the most "silent video" complaints is the narration toggle. Check it before you render, not after.
Test one slide first. If you're worried about a specific animation or transition, export a single slide to verify it works before committing to a full render.
The export is designed to be forgiving. You can export your AI presentations to PPTX, PDF, and Google Slides too, so you're never locked into one format.
06 | Common Pitfalls and Fixes
Even with a great workflow, things go wrong. Here are the most common narration issues and how to fix them fast.
Problem: Audio out of sync with slides. This usually happens when you edit slides after recording narration. The fix: re-record the affected slides, or better yet, finalize slides before recording (see section 02).
Problem: Background noise in the recording. Record in a quiet room, close windows, and use a decent microphone. A USB mic or even your phone's mic in a quiet space beats a laptop mic in a noisy office.
Problem: Pacing feels rushed or draggy. Rehearse your timings. If you're talking too fast, slow down. If slides linger too long, trim the narration or adjust slide duration. Re-recording individual slides makes this easy to fix without redoing everything.
Problem: Narration doesn't appear in the exported video. Check your export settings. Make sure the narration track is included. This is the #1 "silent video" culprit.
Problem: You added a slide after recording. Don't. Seriously. If you must add a slide, re-record the narration for that section. It's faster than trying to splice audio.
Comparison: PowerPoint vs. Zendeck for Narrated Video
| Aspect | PowerPoint Built-in Recorder | Zendeck PPT-to-Video |
|---|---|---|
| Recording interface | Manual, menu-heavy | One-click, slide-by-slide |
| Slide sync | Manual timings | Auto-sync narration |
| Re-recording | Re-record whole deck | Re-record single slides |
| Export formats | MP4, WMV | MP4 + PPTX/PDF/Google Slides |
| Design integration | Separate from design | Integrated with deck design |
| Learning curve | Steep | Gentle |
If you're creating narrated videos regularly — for training, onboarding, or client communication — the workflow difference is the difference between a chore and a habit.
07 | From Narration to Full Micro-Course
Once you've mastered narration, the next step is obvious: build a full micro-course. The workflow supports the entire journey — from outline to video micro-course — so you can go from a rough idea to a polished narrated lesson in one sitting.
Narration is the skill that unlocks everything else. It's the difference between a deck people skim and a lesson people remember. And with Zendeck's PPT-to-Video, it's no longer a production task — it's just part of how you build content.
FAQ
Q: Can I record narration for just one slide in Zendeck's PPT-to-Video? A: Yes. Zendeck lets you record narration slide by slide, so you can re-record a single slide without redoing the entire deck.
Q: What audio format does Zendeck's PPT-to-Video support for narration? A: Zendeck records narration directly through your microphone and syncs it to your slides automatically. You don't need to import separate audio files.
Q: Can I edit slides after recording narration? A: You can, but it's best to finalize slides before recording. If you add or delete slides after recording, you'll need to re-record the affected section to keep audio in sync.
Q: What export format should I use for narrated training videos? A: MP4 is the most reliable format for narrated videos. It handles animations and audio well and plays consistently across devices.
Q: Does Zendeck's PPT-to-Video work for micro-courses? A: Absolutely. Narrated video decks are the core building block for micro-courses. You can create micro-courses from scratch or turn old PowerPoints into interactive micro-courses.