Why Is My PPT to Video Export Blurry? Zendeck's Quality Fix
I. The "Export It Anyway" Moment
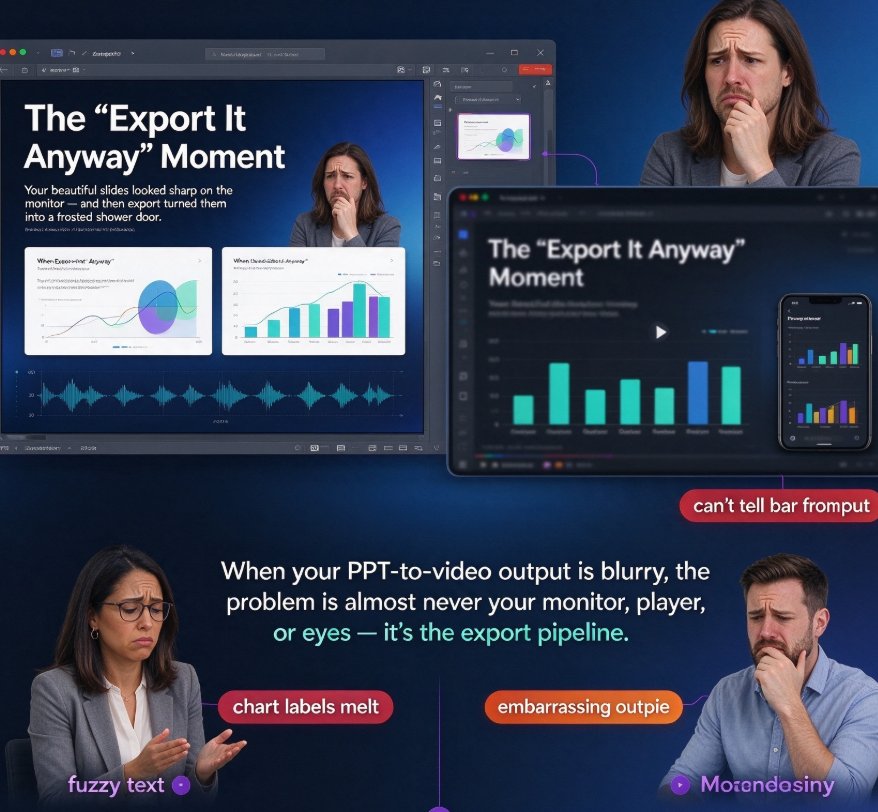
You just finished your deck. You spell-checked, you polished the chart, you even recorded the narration. You hit Export, grabbed a coffee, came back... and your beautiful slides now look like they were captured through a frosted shower door.
If you're an educator, trainer, or content operator turning slides into video micro-courses, you know this moment. Text looks fuzzy. Chart labels melt into each other. On a phone, viewers can't tell a bar chart from a pie chart. It's embarrassing, and it makes you want to scrap the whole project.
Let's be real: when your PPT-to-video output is blurry, the problem is almost never your monitor, your video player, or your eyes. It's the export pipeline — and the fix is a lot simpler than you think.
In this guide, I'll show you the three concrete reasons slides get pixelated in video exports, what "sharp enough" looks like in real numbers, and exactly how to set your export quality so your micro-courses come out crisp the first time. No registry hacks, no guesswork.
II. The Three Usual Suspects Behind Blurry PPT-to-Video
Nearly every blurry export I've debugged traces back to one (or more) of three root causes.
◉ Suspect #1: The slides never left PowerPoint at high resolution
Here's a fact that surprises a lot of people: PowerPoint's default export resolution is just 96 dpi. A standard 13.3-inch widescreen slide exported at that setting comes out to roughly 1280×720 pixels, which is barely half of full HD. Microsoft's own guidance documents this default, and there's a registry key (exportbitmapresolution) that power users tweak to force higher values like 150, 220, 300, or 600 dpi — but that only works on Windows, and the max depends on your Office version. If you're on a Mac or a web-based workflow, that option doesn't even exist.
This default alone explains a huge share of blurry exports. When your final video is 1920×1080 but your source slides were rendered at 1280×720, the encoder — or your video player — has to invent pixels that don't exist. Those invented pixels are what you're seeing as blur.
◉ Suspect #2: The encoder crushed your detail with low bitrate
Even when slides are exported at a decent resolution, the video compression step can destroy them. H.264 and H.265 codecs compress each frame aggressively, and when the bitrate is set too low, the encoder strips fine detail — crisp text edges, thin chart lines, subtle gradients — and replaces them with blocky artifacts.
This is the classic file-size-versus-sharpness trade-off. The encoder wants a small file; you want a readable slide. If you don't set the bitrate deliberately, you lose the detail every time. That's why two decks with identical resolutions can produce wildly different video quality.
◉ Suspect #3: The canvas didn't match the output ratio
Sometimes blur isn't compression at all — it's scaling. If your deck is 4:3 and your video export is 16:9, the export engine stretches or crops. Stretching softens everything. The same thing happens when you export at 720p but the playback platform forces 1080p. The slide content gets upscaled, and upscaling is the enemy of sharp text.
III. What "Sharp Enough" Actually Looks Like — the Numbers
Resolution isn't a vibe; it's geometry. For a standard 13.3-inch widescreen slide, here's how the dpi setting translates into actual pixel width — and you can see why 96 dpi is a problem:
The takeaway: if your slides were rendered at PowerPoint's default 96 dpi, you get 1280 pixels of width — less than half of 1920×1080. That mismatch is the single biggest reason PPT-to-video exports look soft on anything larger than a laptop.
For reference, YouTube's standard upload resolution is 1920×1080. A 96 dpi export gives you 1280×720, and when a player upscales that to 1080p, it has to invent most of the pixels. That's the blur you're fighting.
The good news: this is all fixable in the export step — if your tool lets you control it. Most don't. Zendeck does.
IV. How Zendeck's Quality Settings Fix It — Step by Step
Rather than editing Windows registry keys or guessing at bitrates, Zendeck gives you direct control over the export quality in the PPT-to-Video workflow. Here's how you'd walk through it:
Step 1. Open your finished deck in Zendeck. If it hasn't been through Smart Layout or a brand kit pass yet, do that first — you want the source slides as clean as possible.
Step 2. Start the PPT-to-Video flow. In the export panel, find the Video Quality section.
Step 3. Set the target resolution. For micro-courses watched on phones and laptops, 1080p (1920×1080) hits the sweet spot. If you're publishing to a large-screen LMS or a platform that displays 4K, choose the higher option — as long as your source slides have enough detail to benefit.
Step 4. Raise the bitrate. If your deck has charts, dense text, or screenshots, give the encoder breathing room. A slightly larger file is worth readable text.
Step 5. Match the canvas ratio. Zendeck keeps the slide aspect ratio aligned with the video output, so you avoid the stretch-and-blur trap.
Step 6. Preview before you commit. Zendeck shows you a preview at the chosen quality — zoom into one text-heavy slide to spot problems early.
Step 7. Export, then play the video on an actual phone or large monitor. That's the test that matters.
When you set resolution and bitrate before the encoder touches your slides, you eliminate the two biggest causes of blurry output — in a single pass, without touching the registry. This also means you don't have to babysit the process. Set it once, and every future export from that deck keeps the same quality.
V. Zendeck vs. the Manual PowerPoint Workaround
Let's compare honestly. If you're on Windows and comfortable with regedit, you can bump PowerPoint's export resolution yourself. But here's what that path really costs:
| What you're solving | Manual PowerPoint path | Zendeck PPT-to-Video |
|---|---|---|
| Low default resolution | Edit exportbitmapresolution registry key (Windows only) |
Choose resolution directly in export settings |
| Blurry text after compression | Guess at export settings, re-encode separately | Set bitrate explicitly before encoding |
| Aspect ratio mismatch | Manually resize slides, check after export | Canvas ratio matched automatically |
| Mac or web users | No registry option exists | Works in-browser, any OS |
| Iterating after export | Rebuild or re-export, rinse and repeat | Preview inside the tool, adjust, re-export |
| Time to fix | 30+ minutes of registry and re-export cycles | Under 5 minutes of setting adjustments |
The registry route works — I won't pretend it doesn't. But it's a Windows-only hack that varies by Office version, requires file-size testing, and does nothing about the bitrate problem. For most educators and trainers, the goal is a finished, crisp video, not a registry adventure.
VI. Three Pro Tips So You Never Re-Export Again
Tip 1: Export at the resolution you actually need. 1080p is perfect for phones, laptops, and most LMS players. Going above it only helps if you're publishing to large screens — and even then, check whether your platform displays those extra pixels.
Tip 2: Small text and thin chart lines blur first. If your deck has dense labels, the bitrate matters more than the resolution. Give the encoder headroom. A 5 MB larger file beats an unreadable chart.
Tip 3: Preview on the smallest device your audience uses. If a 5.5-inch phone can render your slide text crisply, every bigger screen will handle it too. That's the cheapest quality test you'll ever run.
And one personal habit: before any big export, do a 20-second preview on your own phone. I've caught more blurry exports that way than with any spec sheet.
VII. Why Crisp Exports Matter More Than You Think
A blurry video doesn't just hurt your pride — it hurts your credibility. For educators, a fuzzy slide deck reads as "this course is stale." For trainers, it makes onboarding material look unprofessional. For content operators, it turns a shareable asset into an internal embarrassment.
When the sharpness is right, everything else in your pipeline works harder. Once your deck-to-video export is clean, you can layer on narration, auto-subtitles, and even interactive elements — and each layer builds on a solid foundation.
For a deeper look at how video decks are reshaping training and course delivery, check out our piece on AI-generated video decks replacing corporate training or the broader 2026 trends in presentation tools.
FAQ
Q1: Why does my PPT-to-video export look blurry when the slides look fine in PowerPoint?
PowerPoint exports slides at 96 dpi by default — roughly 1280×720 pixels for a standard widescreen slide. On top of that, low bitrate during video compression strips fine detail. Both problems are solvable at export time by setting the right resolution and bitrate, which is what Zendeck's export settings are designed for.
Q2: What resolution should I choose for a micro-course video?
1920×1080 (1080p) is the sweet spot for phones, laptops, and most LMS platforms. Choose a higher setting only if your viewers are on large screens. Also verify that your slide aspect ratio matches the output ratio — mismatched ratios cause stretching that looks like blur.
Q3: Does a higher bitrate always make the video sharper?
Not by itself — but it matters a lot for slides with small text, dense charts, or screenshots. A higher bitrate gives the encoder more data to preserve fine detail. Combine it with the correct resolution and you'll eliminate most blur in one pass.
Q4: Can I preview the export quality before converting?
Yes. Zendeck previews your video at the selected quality settings before export, so you can zoom into a text-heavy slide and catch problems before you commit.
Q5: Is Zendeck's export quality better than PowerPoint's default?
Zendeck lets you control resolution and bitrate directly in the export flow, bypassing PowerPoint's 96 dpi default and the Windows-only registry hack. For educators, trainers, and content operators, that's the more reliable path to crisp output.