How to Create a Product Demo Video with Zendeck's PPT-to-Video
You've been there: 40 minutes into a screen recording, you mispronounce a feature name, the cursor drifts across the UI, and the record button has been red the whole time. So you start over. Again. Product demo videos are supposed to be your sales team's secret weapon — but most teams build them like it's 2015, with screen recorders, timeline editors, and a lot of re-recording.
Here's the shift that changes everything: you can create a product demo video from your feature slides in minutes, with no video editor and no screen recording marathon. Zendeck's PPT-to-Video turns a deck into a narrated, on-brand video that sales can send, marketing can post, and customers can actually follow.
In this guide, I'll walk you through the exact workflow — from outline to exported demo video — and show you when PPT-to-video beats screen recording (and when it doesn't).
01 Why product demos die in screen-recording marathons
Let's be honest about how most product demo videos get made today. Someone on the team opens a screen recorder, launches the product, and starts talking. The first take goes fine until the third sentence, when they realize the browser tab is showing the staging environment with fake data. Take two: the microphone picks up a keyboard clatter. Take three: the cursor disappears. Take four... you get the point.
The pain isn't the product. It's the process.
Screen recording is fragile because it's a single continuous take. One mistake anywhere means the whole thing starts over. And once you finally get a clean take, you still need to edit out the dead air, add captions, zoom into the right areas, and keep the branding consistent. That's why so many demo videos end up either outdated or never published at all.
Most product demo videos fail before they're published — not because the product is hard to explain, but because the production process is too fragile.
The outcome is predictable: sales reps send links to a demo that shows last quarter's UI, marketing reuses the same launch video for months, and customers watch a recording that feels like a screen share from a Zoom call that should have ended.
02 What PPT-to-video changes: slides become the demo script
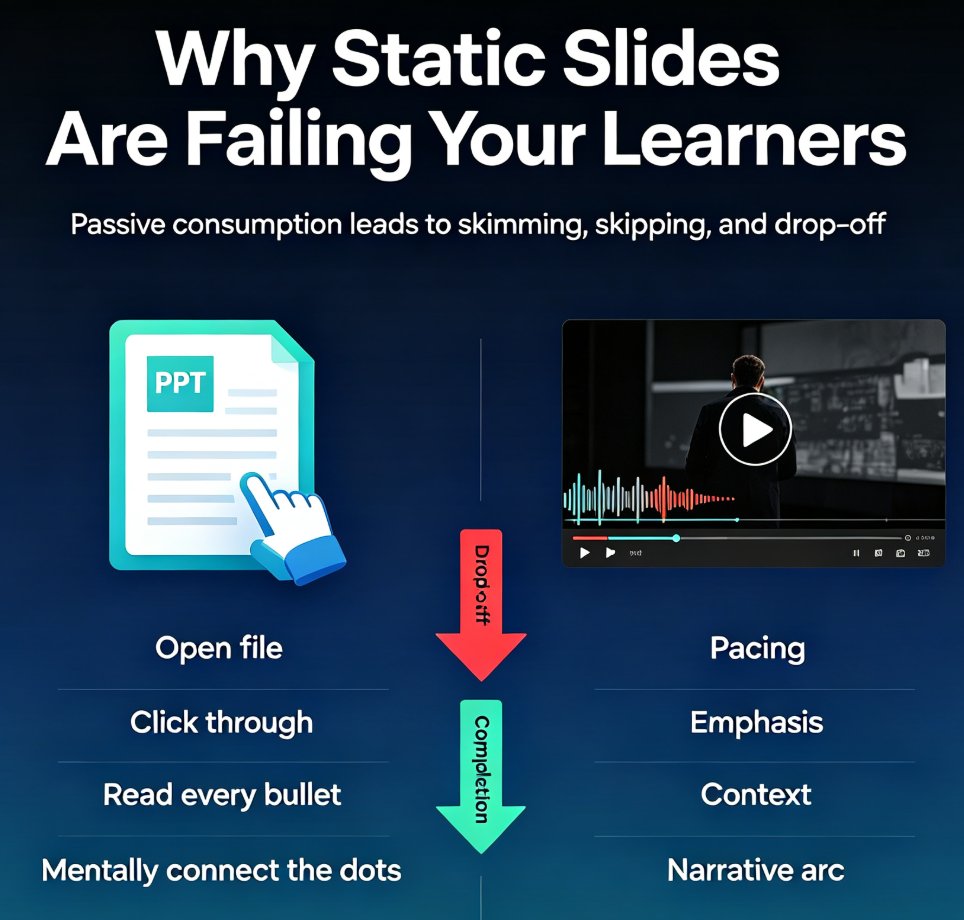
Here's the reframe. A product demo doesn't have to be a live screen capture. It can be a sequence of well-designed slides — each one showing a feature, a workflow, or a result — with narration on top. That's exactly what PPT-to-video does.
Instead of recording your screen, you build the demo as a deck. Each slide is a scene. Each scene has a voiceover. The export stitches it together into a video your team can share anywhere.
Why this works for demos specifically:
- Slides force structure. A screen recording lets you ramble. A slide deck forces you to decide what matters before you hit record.
- Re-records are cheap. Flubbed a line on slide 4? Re-record just that slide's narration, not the whole video.
- Branding is automatic. Templates and brand kits keep every frame consistent — no more demos that look like a random screen grab.
- Updates are fast. When the product changes, update the slide, re-export, done.
Here's a quick comparison of the two approaches:
| Aspect | Screen recording | Zendeck PPT-to-Video |
|---|---|---|
| Setup time | Install recorder, configure audio, clean the desktop | Open a deck, pick a template |
| Cost of a mistake | Re-record the entire take | Re-record one slide's narration |
| Visual consistency | Depends on the live UI and desktop clutter | Controlled by templates and brand kits |
| Editing effort | Timeline editing, cuts, captions, zooms | Scene-based editing, mostly done |
| Branding | Manual overlays and watermarks | Applied automatically |
| Distribution | Export file, upload, hope the quality holds | Export video or share the deck directly |
When your demo starts as slides, every re-record is just a re-export. That single shift removes the fear of recording — which is usually the real reason demos don't get made.
03 Step-by-step: turn feature slides into a narrated demo video
Let's get practical. Here's the workflow I'd use to create a product demo video with PPT-to-Video, no video editor required.
◉ Step 1: What story is your demo telling?
Before you open any tool, write the story. A demo video is not a list of features — it's a narrative: here's the problem, here's how the product solves it, here's what success looks like.
A good demo outline looks like this:
- Hook: the pain your customer feels (one slide)
- The solution at a glance: your product's core value (one slide)
- Three to five key features, one per slide
- A real workflow or use case (two to three slides)
- Results or proof points (one slide)
- Call to action (one slide)
Keep it to 8–12 slides. If you have more, you're building a course, not a demo.
◉ Step 2: How do you turn an outline into slides?
You can paste a Markdown or Word outline into Zendeck and let the AI generate a structured deck, or start from a template in the library. For product demos, choose a clean, modern template — you want the product screenshots to stand out, not fight the background.
If you already have feature slides from a pitch deck or sales deck, import them directly. The smart layout will unify fonts, colors, and spacing so the demo doesn't look like five different decks stapled together.
◉ Step 3: How do you add narration without re-recording everything?
This is where the magic happens. Instead of recording your screen and voice at the same time, you add narration to each slide. You can record your voice slide by slide, or use AI voiceover if you want a consistent, studio-quality read without a microphone.
A few practical notes from experience:
- Write the script first, then record. Even a rough script cuts your recording time in half.
- Keep each slide's narration to 15–25 seconds. If a slide needs more, split it into two slides.
- Record in a quiet room, but don't obsess over gear. A decent USB mic beats a laptop mic; a laptop mic beats no video at all.
For a deeper walkthrough of the narration workflow, check out how to add narration to your slides.
◉ Step 4: What should you check before exporting?
Once the narration is in place, export the deck as a video. Watch it once, all the way through, before you share it. You're checking three things:
- Pacing: does each slide stay on screen long enough to read, but not so long that it drags?
- Transitions: do the scene changes feel natural?
- Audio: is the volume consistent across slides?
If slide 6 feels rushed, re-record just that slide. No full re-take. This is the workflow advantage that makes PPT-to-video feel almost unfair compared to screen recording.
◉ Step 5: How do you create variants without starting over?
Here's a trick most teams miss: you can create multiple demo videos from one deck. Duplicate the project and generate a different length, voice, or aspect ratio. That's how you get a 60-second teaser for social, a 3-minute version for sales calls, and a full walkthrough for the website — all from the same source slides.
This works especially well for multi-language versions. Keep the deck, swap the narration language, re-export. Your sales team in three regions gets the same demo in their own language without anyone touching a video editor.
04 Make the demo feel like a product, not a lecture
The biggest risk with slide-based demos is that they feel like a webinar from 2012. Here's how to avoid that.
Show the product, not just the slide. Use real product screenshots, annotated with arrows or callouts, instead of generic icons. A demo video should make the viewer think, “I can see myself using this.”
One feature per slide, one idea per sentence. If a slide has three bullet points and each bullet has a sub-bullet, your viewer is reading, not listening. Cut until only the essential remains.
Add a visible call to action. The last slide should tell the viewer what to do next: book a demo, start a trial, visit the pricing page. A demo video without a CTA is a documentary.
Keep it under three minutes. For sales enablement, shorter is almost always better. If your demo needs more time, make it a series: a 90-second overview plus a deeper walkthrough for interested prospects.
A good product demo video is not a feature tour. It's a story about a problem your customer recognizes, with your product as the solution. Structure every slide around that story, and the video will feel like a conversation, not a lecture.
If you're building demos for a sales team, you'll also find the sales training deck workflow useful — the same slides can power both a live training session and a self-serve video.
05 When to use PPT-to-video vs. screen recording
Let's be fair to screen recording: it's not dead. It's the right tool for some jobs.
◉ When should you use PPT-to-video instead of screen recording?
Use PPT-to-video when: - You're creating an overview, teaser, or sales enablement demo - The product UI changes often and you need cheap updates - You need branded, consistent videos across languages or regions - You want a video without hiring an editor or learning a timeline tool
Use screen recording when: - You're reproducing a live bug or a specific UI interaction - The demo depends on real-time data or a live environment - You're recording a Q&A or an interactive session
For most product marketing and sales enablement needs, the slide-based approach wins. It's faster to produce, easier to update, and far less stressful to create. And when you need a narrated, on-brand video from a deck, the PPT-to-Video workflow is the shortest path I know.
If you're curious about the broader shift, this is part of a larger trend: AI-generated video decks are quietly replacing traditional corporate training and demo production. The same workflow that turns a compliance manual into a video course also turns your feature slides into a demo.
FAQ
Can I create multiple product demo videos from one deck?
Yes. Duplicate the project and generate a new version with a different length, voice, or aspect ratio. This is ideal for creating a short teaser, a full walkthrough, and multi-language versions from the same source slides.
Will my product screenshots, diagrams, and captions be preserved?
Yes. Visuals and layout from your slides are preserved in the video export. The smart layout unifies fonts, colors, and spacing, so your screenshots stay intact while the overall design becomes more consistent.
Do I need a microphone or a video editor to create a demo video?
Neither is strictly required. You can record narration slide by slide with a microphone, or use AI voiceover for a consistent read. The export process handles the video assembly, so you don't need a separate video editor.
How long should a product demo video be?
For sales and marketing, aim for under three minutes — ideally 60 to 90 seconds for a teaser. Keep each slide's narration to 15–25 seconds, and if the content needs more time, split it into a series of shorter videos.
How do I update the demo when my product changes?
Update the relevant slide, re-record that slide's narration if needed, and re-export. Because each slide is a scene, you don't have to redo the entire video — that's the main advantage of PPT-to-video over screen recording.